
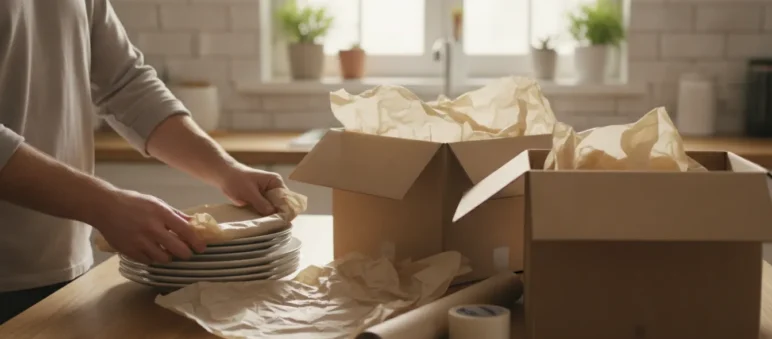
Broken plates and cloudy glassware are not inevitable moving-day problems. The safest packing plan combines the right box, generous cushioning, and careful weight control from the first layer to the final seal.
To learn how to pack dishes for a move, wrap each piece, cushion the box generously, and place plates on edge instead of stacking them flat. Keep heavier items low, fill empty spaces, and stop before the box becomes too heavy to lift safely.
The kitchen often takes longer than expected because it combines fragile materials, awkward shapes, and dozens of small pieces. A room-by-room approach makes the work more manageable and helps you spot items that need special protection. Start by understanding why this room is so challenging, then choose supplies and packing methods that match each item.
If you prefer experienced help, professional packing services can save time while adding care for especially delicate kitchen belongings.
Request your free in-home estimate
Why the Kitchen Is the Hardest Room to Pack Efficiently
The kitchen combines several packing challenges in one space: fragile dishes, heavy cookware, sharp tools, and hundreds of small pieces that can shift or disappear. That mix makes it harder to protect everything while keeping each box safe to lift.
Dishes and glassware can crack when they touch or move against one another. Cookware adds weight quickly, even when a box does not look full. Utensils, lids, serving pieces, and small appliances also create awkward gaps that need careful cushioning. A kitchen box may contain a delicate item beside something heavy, rigid, or sharp.
Overfilled boxes create two problems. They are difficult to carry, and the bottom may fail under the weight. Smaller boxes are safer for fragile kitchen items because they remain more manageable and are less likely to be dropped. A practical goal is to keep each kitchen box at about 40 pounds or less. This protects your back, your movers, and the box itself. Move.org recommends keeping packed boxes to 40 pounds or less.
Sharp tools require another layer of attention. Knives and other blades can cause hand injuries if they are loose inside a carton or hidden beneath packing paper. Wrap each blade with a protective sleeve or heavy cardboard before placing it in a box. Broken glass creates a similar hazard, so do not reach into a carton to search for an item without checking how the contents are arranged. The Mayo Clinic notes that sharp kitchen tools and broken glassware are important sources of kitchen hand injuries.
For many homeowners, the hardest part is not knowing how to pack dishes for a move. It is maintaining consistent care across an entire room. Work in small groups, separate heavy items from fragile ones, and label boxes as you go. If the process becomes too time-consuming, consider packing services for your move to help protect delicate items and keep the project organized.
Best Boxes and Materials for Packing Dishes and Glassware
The right packing materials give dishes room to stay protected without making each box too heavy to lift. Before you begin, gather supplies that support the box from the bottom, separate fragile pieces, and cushion every open space.
- Cell or dish boxes: Choose boxes with cardboard dividers when possible. Individual compartments help keep plates, glasses, and other pieces from knocking against one another during handling. They are especially useful when packing mixed kitchenware. Dedicated dish boxes are widely recommended for fragile kitchenware.
- Heavy-duty, double-walled boxes: Kitchenware becomes heavy quickly. Double-walled construction helps keep the bottom from bursting under the weight of dishes and glassware. Smaller boxes are easier to control than one large box packed with fragile items.
- Extra packing tape: Reinforce the bottom seam of any standard box with additional tape before adding contents. Once the box is packed, seal every seam with clear, durable shipping tape. A quality tape seal helps prevent the box from opening or failing during transit.
- Packing paper: Use clean packing paper between dishes and glassware, then add more paper around the sides and in empty spaces. The paper should cushion items so they cannot shift and collide inside the box.
- Bubble wrap: Keep bubble wrap available for especially delicate pieces, glassware, and items that need more impact protection. Use enough cushioning to separate each item rather than relying on one thin layer around the outside.
- Box labels: Keep a marker nearby so you can identify fragile kitchen boxes after sealing them. Clear labels make it easier to place and handle these boxes carefully during the move.
Skip newspaper, even if it is convenient or free. Ink can smudge onto porcelain and leave stains that are difficult to remove. Clean packing paper is a safer choice for dishes, ceramics, and other light-colored surfaces. Professional movers also caution against newspaper because its ink can stain delicate porcelain.
Finally, do not fill a box simply because there is room left. Add cushioning, check that the contents are stable, and keep the finished box manageable. Strong materials help, but careful packing is what protects the dishes.
How to Pack Dishes for a Move Without Cracking a Single Plate
The safest approach is to cushion every piece, keep weight under control, and arrange dishes so the box absorbs movement instead of the ceramic. Follow these steps in order, and pause whenever a box feels too heavy or unstable.
- Prepare a sturdy box. Choose a small or medium dish box rather than a large carton that could become difficult to lift. If you are using a standard box, reinforce the bottom seam with extra packing tape before adding anything. A reliable base matters because dishes create concentrated weight.
- Create a shock-absorbing base. Crumple several sheets of clean packing paper and build a thick, springy layer across the entire bottom of the box. This layer helps absorb impact from below. Do not pack dishes directly against the cardboard.
- Wrap each plate individually. Place one plate on packing paper, fold the paper around it, and repeat for every piece. Put a fresh sheet of paper between each plate or bowl. The paper prevents direct contact, scratches, and small movements from turning into chips. Avoid newspaper because its ink can smudge onto porcelain or ceramic surfaces. Colonial Van Lines recommends wrapping each piece with paper between dishes for this reason.
- Load plates vertically on their edges. Stand wrapped plates upright in the box, like records, instead of stacking them flat. Plates are stronger in this position and less likely to break during transit. Keep the row snug, but do not force pieces together or leave gaps where they can knock into one another.
- Arrange weight from heavy to light. Put heavier dishes at the bottom and lighter or more delicate pieces above them. Heavy items should never sit on top of lighter pieces, where they can crush them. If you are packing bowls with plates, use padding to keep each group supported and stable.
- Pack large platters separately and vertically. Wrap each platter individually, then stand it on edge along the side of the box or in a suitable dish carton. Do not lay large platters flat beneath a heavy stack. Their broad surfaces need cushioning and vertical support to reduce impact damage. Move.org advises wrapping platters individually and storing them upright.
- Fill empty spaces as you go. Use crumpled packing paper around the sides and between groups when needed. The goal is a snug arrangement that does not allow dishes to shift, but never compress the contents so tightly that pressure builds on the edges.
- Finish with a top cushion. Once the box is filled, cover the dishes with a thick layer of crumpled paper. Fill the remaining space so items cannot move if the box is tilted or handled roughly. Close the flaps only when the contents feel supported.
- Seal and check the box. Reinforce every seam with durable shipping tape. Gently move the closed box. If you hear dishes shifting, reopen it and add more paper. Keep the finished box manageable, ideally 40 pounds or less, so it can be lifted safely without being dropped.
Request your free in-home estimate
How to Pack Glasses, Stemware, and Mugs Safely
Glasses need protection from two directions: impact from outside the box and contact with other items inside it. Wrap each piece individually, support hollow spaces, and prevent movement before sealing the carton. A practical guide from Colonial Van Lines also recommends separating fragile kitchenware with protective packing materials.
Wrap wine glasses around the stem first
The stem is usually the most vulnerable part of a wine glass. Wrap the stem of each glass separately in bubble wrap before wrapping the entire glass. This creates extra reinforcement where a narrow piece could snap under pressure.
For additional surface protection, wrap each stemmed glass in tissue paper first, then add bubble wrap around the whole item. The tissue helps prevent scratches, while the bubble wrap absorbs impact. Secure the wrap without tightening it so firmly that it presses against the bowl.
Protect tumblers and other glasses individually
Wrap tumblers, drinking glasses, and decorative glassware one at a time. Add a layer of crumpled packing paper around the outside if the item has a delicate rim or unusual shape. Place wrapped pieces into individual cells when available, or use dividers to keep them from touching.
Set each glass upright unless its shape or the box design requires another position. Fill gaps with soft packing paper so the contents cannot shift. Do not leave empty space around the sides, corners, or top of the carton.
Support the inside of mugs and oddly shaped pieces
Mugs have handles that can catch against neighboring items. Wrap the handle and body separately as needed, then cover the entire mug with bubble wrap. Place crumpled packing paper inside each mug to support its walls from the inside out. Use the same approach for vases and other structurally fragile or oddly shaped items.
Keep heavier mugs below lighter glassware, and avoid packing too many pieces into one carton. When the box is full, gently test it for movement and add paper wherever you hear shifting. The goal is a snug pack, not a compressed one.
How to Pack Pots, Pans, and Kitchen Appliances
Heavy cookware and small appliances need a different approach from plates and glasses. The goal is to protect surfaces, prevent shifting, and keep each box manageable enough to lift safely.
Nest cookware with a protective layer
Start by cleaning and drying your pots and pans completely. Choose a larger pot as the base, then place a sheet of packing paper inside it before adding the next smaller piece. Continue nesting the cookware with paper between each surface. This saves space while preventing metal, enamel, or nonstick finishes from rubbing against one another. The same method works for mixing bowls, provided the shapes fit securely.
Keep the heaviest cookware low in the box. Add lighter items around it, and use crumpled packing paper to fill open spaces. A box that is packed tightly but not overfilled is easier to carry and less likely to shift during handling. If the box becomes difficult to lift, divide the cookware between two boxes instead of forcing everything into one.
Protect appliances and sharp tools
For countertop appliances, use the original box and molded inserts whenever you still have them. The original packaging is designed to hold the appliance in place. If the box is unavailable, wrap the appliance generously in bubble wrap, paying extra attention to corners, controls, and other vulnerable parts. Remove detachable components, wrap them separately, and place them inside the box so they cannot strike the appliance during transit.
Secure food processor blades, knives, and other sharp tools before packing. Slide each blade into a protective cardboard sleeve, then add paper around the sleeve so it cannot move. This protects the blade and reduces the chance of a cut when someone reaches into the box. Bundle silverware in small paper-wrapped groups rather than scattering loose pieces throughout the box. Grouping keeps utensils organized and helps prevent them from scratching other kitchenware.
For more guidance, see our guide to packing kitchen items properly. Before sealing any cookware or appliance box, check that nothing moves when the box is gently handled. Mark the box clearly, keep its weight reasonable, and place it where it will not be crushed by heavier belongings.
Should You Pack Your Kitchen or Let the Movers Do It?
Packing your kitchen yourself can reduce moving costs and lets you decide what stays, goes, or gets donated. It also requires time, steady organization, and the right materials. Professional packers cost more, but they bring specialized supplies and know how to protect fragile pieces efficiently. The better choice depends on your schedule, the value of your kitchenware, and how much risk you want to manage.
| Consideration | DIY packing | Professional packing |
|---|---|---|
| Cost | Usually the lower-cost option because you provide the labor. You still need to purchase boxes, packing paper, tape, and cushioning. | Higher upfront cost for labor and materials, with less of your own time spent preparing the kitchen. |
| Time | Can take several focused sessions, especially when sorting, washing, wrapping, and labeling each item. | A trained crew can pack efficiently while you handle other move-day priorities. |
| Materials | You must source suitable supplies. Use dish boxes or small sturdy boxes, reinforce seams, and avoid newspaper because ink can stain porcelain or ceramic. | Pros bring dish boxes with dividers, quality packing paper, padding, and other materials designed for fragile kitchenware. |
| Breakage protection | Protection depends on your technique. Wrap each piece, cushion empty space, and keep kitchen boxes at 40 pounds or less for safer handling. | Experience with fragile glassware, structured boxes, and consistent packing methods can reduce shifting and impact during transit. |
If you choose the DIY route, do not rush the pieces that matter most. Place heavy items below lighter ones, cushion every gap, and check that nothing moves before sealing each box. Smaller boxes are easier to lift and less likely to become dangerously heavy. For heirlooms, crystal, artwork, or other fragile or high-value items, specialized handling may be worth the added protection.
For a full kitchen or a tight moving timeline, professional packing services can take over the most delicate and time-consuming work. You can also pack everyday items yourself and have the crew handle glassware, china, and breakable serving pieces. That blended approach keeps some control over cost while adding experienced protection where it matters most.
Request your free in-home estimate
Frequently Asked Questions
Should dishes be packed flat or vertically?
Pack plates and bowls vertically on their edges, rather than stacking them flat. This position helps each piece handle movement with less pressure across its surface. Wrap every dish separately, place packing paper between pieces, and add cushioning around the group. Keep heavier dishes below lighter items when the box includes different types of kitchenware.
What materials do I need to pack dishes safely?
Gather small, sturdy dish boxes, packing paper, quality packing tape, and bubble wrap for especially delicate pieces. Cell dividers add protection for glasses and other items that could strike one another. If you use a standard box, reinforce its bottom seam with extra tape. Fill empty spaces so the contents cannot shift during handling.
Can I use newspaper to wrap dishes for moving?
It is better to use plain packing paper. Newspaper ink can rub onto porcelain, ceramic, and other delicate surfaces. Packing paper also gives you a clean layer for wrapping each item and placing between plates or bowls. If a dish is valuable or unusually fragile, add bubble wrap around the paper rather than relying on a single layer.
How should I pack glasses and stemware?
Wrap each glass individually with tissue or packing paper, then add bubble wrap for impact protection. Give wine-glass stems extra attention by wrapping them separately before covering the entire piece. Place glasses in cell dividers when possible, and fill their interiors with soft paper when they need additional support. Do not leave empty space around them.
How heavy should a dish box be when packed?
Keep a dish box at 40 pounds or less so it remains manageable to lift and less likely to strain the box or the people handling it. Use smaller boxes for dense kitchenware instead of filling one large carton. After sealing, label the box clearly as fragile and note which side should stay up.
Ready to Plan a Safer Move?
Careful packing helps protect your dishes, glassware, and other kitchen items from avoidable damage. A personalized moving plan can also help you understand which tasks to handle yourself and where professional support may save time.